 rapping a perch is quite easy and only takes a few materials. The point of wrapping a perch is not to pad the perch, but to create a perch that is the proper width for the bird's foot, and to create an uneven surface for her to perch on.
Start with a clean perch that is the right temperature so that the epoxy will adhere properly.
Materials:
- Epoxy
- Pipe insulation (optional)
- Sisal or Manila rope - 3/8" or 1/4" diameter and preferably from the US due to chemical treatments; nylon is not recommended
- Knife or scissors
- Hammer
- Paper plate and plastic knife - for mixing the epoxy
- Perch
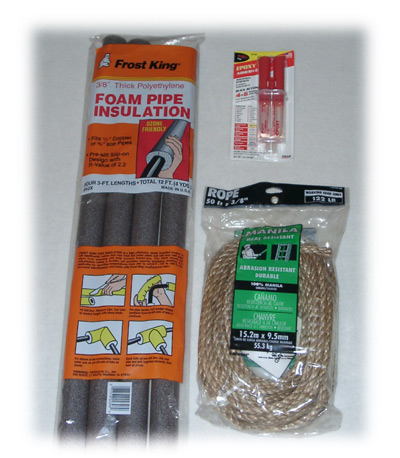 |
Some of the equipment to properly wrap a perch |
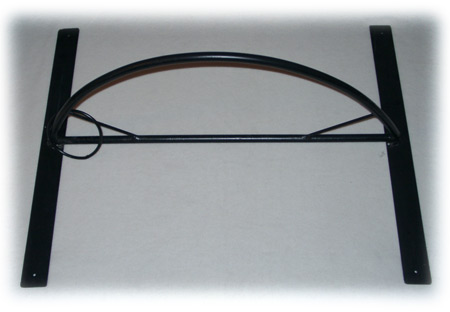 |
An unwrapped bow perch |
Wrapping
Make sure you put down newspaper or other protection to prevent epoxy from dripping.- Take your rope and fray one end slightly. This will give it more surface area to stick to the perch and allow it to give a smooth transition from the perch to the wrapped area allowing the ring to slide over it.
- Mix the epoxy quickly with a plastic knife. Stick the frayed end of the rope into the pool of epoxy and get it well covered.
- Hold the rope up to the perch and smooth the epoxy against the perch constantly as it starts to set up. This will initially mean you will need to hold the rope against the perch to form the bond, but then will just need to hold the rest of the rope up so that it does not put stress on the bond as it forms.
Rope is easily held in place for epoxy and drying with twisty ties. - Leave this for a half-hour to really let it set up, depending on how long your epoxy takes to set.
- Depending on how you are wrapping, there are several options. For a wide diameter of perch base, you may not need or want any padding. Some will want padding such as tightly wrapped rags under the rope. Foam pipe insulation doesn't hold moisture. It is excellent, especially on a jump-up perch where the bird will be landing, sometimes forcefully, on it. If the perch base is very narrow, you may need to wrap the area twice to get the correct diameter. Make sure to wrap tight enough that a talon cannot get caught between sisal wraps. This tightness usually renders any padding underneath useless.
- While the epoxy dries, cut a length of pipe insulation to the length of the area that will be the perching surface. Taper the ends with an exacto knife to give a better transition in the diameters. It is important that the ring is able to slide easily from one side of the perch to the other.
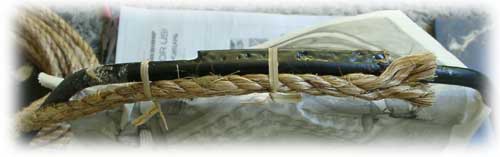
Rope epoxied to the perch and the pipe insulation fitted over the top. - Start wrapping keeping each turn as tight next to the previous one as possible. You want no spaces and to get these as close as possible so that it stays well wrapped as the rope settles. With a hammer, bang every third turn of the rope against the previous turns to tighten it. If you are using padding, then this is not feasible, and you will not want it as tightly wrapped. You can also grab the turns of rope that have been laid on and twist it in the direction that it is wrapped to tighten it further.
- Make the ending transition as smooth as possible coming off the padding. For the last few turns, go ahead and wrap the rope around, but do not tighten. Mix some more epoxy and apply it heavily underneath the perch where the last wraps will go. The epoxy will squeeze up between the turns and better anchor the rope. Hold this in place for several minutes to allow the bond to start to form. Once this is fairly stable, measure off several more feet of rope and then cut there. With the tail end, tie it around a stationary object so that it continues to hold the rope taunt. The epoxy you've put down will be the anchor. We will make the termination cleaner, but only after the epoxy has dried and the rope is held firmly.
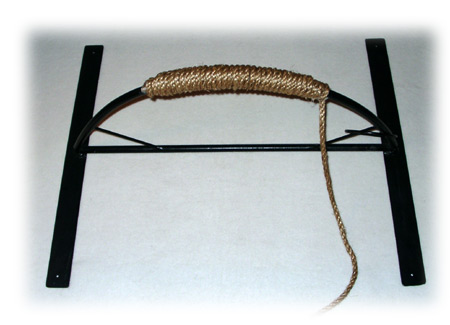
Rope wrapped around the perch and epoxied down on the terminating end, but the tail still on. - Once the rope is held down well, trim the end of the rope so that it will end just under the perch fraying the end slightly.
- Mix some more epoxy and slather it on that frayed end. Sliding a plastic baggie over your hand can allow you to smooth the glue down without getting too messy.
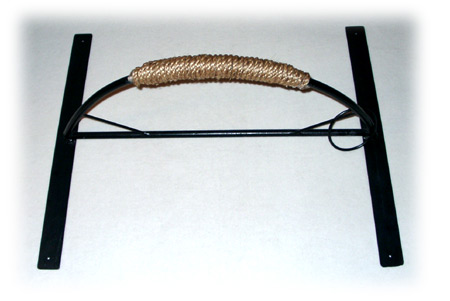
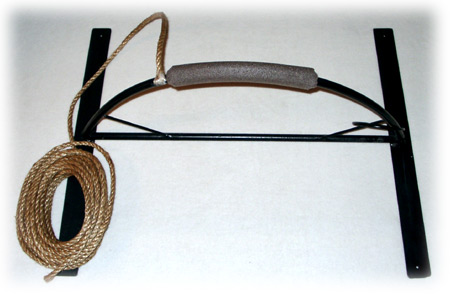
Finished wrapped perch. - Allow to dry thoroughly before letting a bird on it. If there is considerable smell either from the epoxy or from whatever treatment the rope has had, let it stand in the sun for at least a day to deactivate the chemistry.