Bells are used to help locate a bird while hunting. Some falconers leave the bells on the bird at all times while others only attach bells when they are hunting. One consideration when choosing a bell is the size. The bells can be quite cumbersome and having a lot of metal down near the feet banging around can be uncomfortable. Very tiny bells can only be heard when close to the bell. Many people flying falcons will not even use a bell as the bird is so high as to be out of hearing range. Choose a bell with your bird in mind, not just the thought that a larger bell will be a louder bell. Indeed, it is more useful to have two bells of slightly different tones than two larger bells - the off tones will carry farther and be easier to locate than two large, identical bells. Birds may be annoyed at a bell when it is first introduced. A piece of tape can be placed over the opening or across the slit to dampen the sound initially, or while in the mews.
Never use a jingle bell or a bell not made for falconry. These bells usually have a slit that could catch a bird's beak or talon. A bird can easily crack its beak if caught in the slit of a bell. Pay for good quality equipment and a well made falconry bell. It will last for many years. Over time the metal in the bell becomes work hardened where the tone sounds dead and will eventually crack. Bells left on a bird constantly will hit this point much faster. This can be reversed in a process called annealing. This is when the bell metal is removed from the bird and any leather equipment and then heated until it just glows being careful not to melt any of the soldering. This can easily be achieved with a propane torch, but can also be done on the stove. The bell will be red and have a soft glow from the heat, and should then be dunked in cold water. This process works best on brass, particularly benefitting low quality metal. German silver, or nickel-steel alloys should not need this. In normal use dirt can get caught in a bell and silence it. Bells can be removed from the bird and boiled to help release this material, and a blast of spray air or carburetor cleaner may dislodge it. Bells may also benefit from a quick vinegar polish.
Bells are traditionally attached directly around the bird's leg with a small strip of leather called a bewit, but may be attached in three main ways: to the leg, to the tail, or to the neck.
 |
A fine bell made by Larry Counce. Notice that the bewit attached to the bell is passed through itself preventing the metal of the bell loop from ever coming into contact with the bird's leg. This is an important function of the bewit - to protect the leg. |
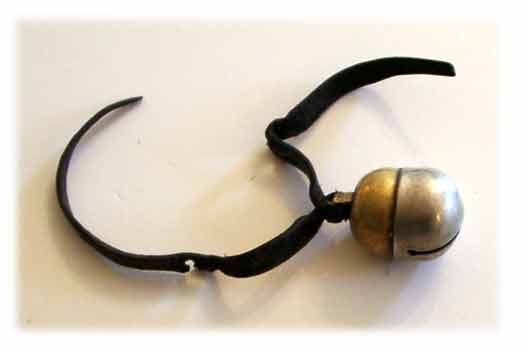 |
A bell and long bewit. |
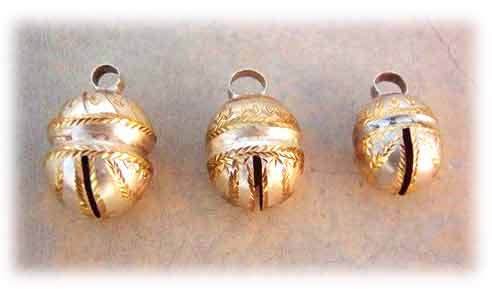 |
A highly decorated jeweled bell by Salman Ali.
Photo courtesy of Salman Ali. |
Leg Mounted Bells
It is very important that if a bell is attached directly around the leg, only a natural material such as leather is used to do it. If leather is used, then the sueded side of the leather should face away from the bird's leg. If you want to quickly get a bell on and off and want to use cable ties, the cable ties must never go around the bird's leg. Instead, use the cable tie to attach the bell to the anklet.
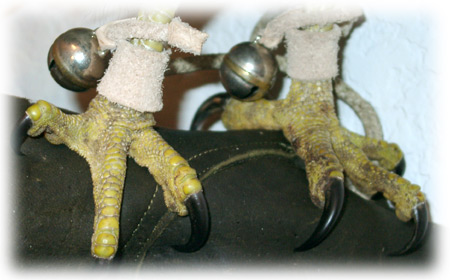 |
Bells mounted on a freshly trapped Red-Tail's legs using the traditional bewit to attach them. |
 |
If a cable tie is used to attach a bell, it should only be attached to leather as in here; never attached directly to the bird's leg. Also note that the cable tie is pulled tight enough that a talon could not get caught in there and the tail of the tie was trimmed so that it would not poke the bird. The bell is also attached such that it will least bang on the bird's toes. |
Tail Mounted Bells
Tail mounted bells require a clip on the shaft of a tail feather to attach the bell to. It is common to use a tail mounted transmitter and a tail bell together as they will both be attached to the same mounting on the tail feather. One disadvantage of the tail mount is that some birds dislike it and will end up pulling out a feather to remove the mounting. Other birds don't mind it, but if the mounting catches on anything, then the feather will also result in being pulled out. The advantage of this mounting is that many birds will not move their feet when they are down on game, yet they may move their tail. The tail bell would be heard in that case. The tail mounted transmitter also has the advantage of not hanging down past the bird's form and is less likely to connect with power lines and cause an electrocution.
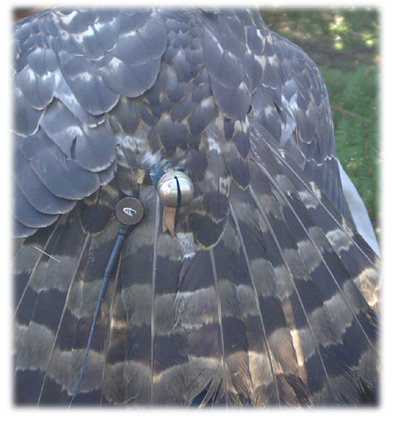 |
A tail bell mounted along with a transmitter. |
Neck Mounted Bells
Traditionally a short leather strap is used to attach a bell around the bird's neck, but many falconers now prefer an elastic band of some sort. A thin elastic band or a 1/16" covered elastic (can be found in sewing stores) works well. The warning with the elastic is that it must be tight enough to prevent the bird from getting a toe caught in it if she scratches or getting her lower mandible caught in it if she preens or catching on something as she's hunting, yet loose enough to allow her to eat and cast comfortably. Elastic can also lose its elasticity over time, so check the condition of it often. The other warning is to select a material that will break. If the neck bell elastic gets caught on something and the elastic does not break, chances are the bird's neck will break. As such a Scunci hair band is a bad choice of materials as it just won't break. A thin strip of leather is good as is a thin rubber band. If the bird catches it on a twig or catches a talon through it, she will easily break the band. Some falconers can go without ever having an incident with any neck bell material, however it should be cautioned that the loop can catch and a material that will break can save a bird's life. A zip tie or cable tie should never be used around a bird's neck as it can always tighten and strangle her. A good material are the silicone hair bands that can be found at stores such as Walgreens or Wal-Mart in packages of 300 for something near $1. Again, a dime sized band for a Sharpie, a nickel sized for a Coopers Hawk, and a quarter sized for a Goshawk is a good rough estimate. Extending them a little can also help ensure they are stretched sufficiently. Taking the quarter sized and stretching it over a Coke can (around the circumference) overnight can put a bit more "give" in it. These should just be put on just before hunting then cut off right after hunting.
As a point of reference, an average Sharp-Shinned Hawk has a neck diameter about the size of a dime (about 18mm), an average Cooper's Hawk has a neck diameter about the size of a nickel (about 21.2mm), and an average Goshawk has a neck diameter of about the size of a quarter (about 25mm). The elastic should not be stretched over this coin when it is measured, but just laid over without any stretching. This is the same size for measuring a jangoli for a bird. The risk of a wrong size or material is that a bird could strangle herself or could be prevented from casting.
The small diameter loop minimizes feather damage, minimizes aggravation to the feeding hawk, minimizes clogging with blood and feathers, eliminates caught lower mandibles, and minimizes the chance of a caught toe or twig.
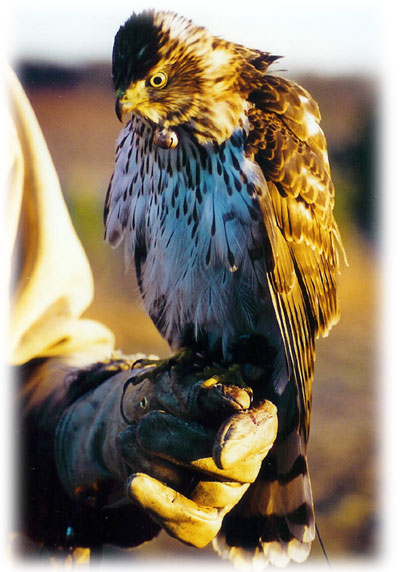 |
A neck bell on a Cooper's Hawk.
Photo courtesy of Kory Koch. |
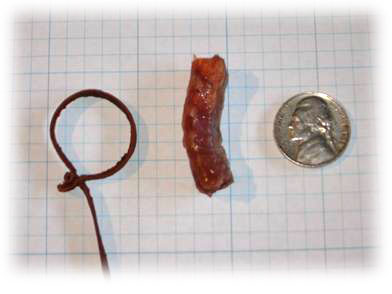 |
A neck bell tie made of a thin strip of leather. The neck here is the neck from a dead Cooper's Hawk (3/8" diameter) shown for comparison next to an American Nickel. The leather loop is large enough to allow the bird to eat a normal sized meal and to cast, yet is small enough to tuck under the feathers and not catch the bird's talon when she scratches. Using a thin leather strap similarly allows the loop to break if it encounters any real resistance such as the bird's talon becoming caught or a twig from a tree branch. The leather loop shown here is sized for a Cooper's Hawk - just large enough to fit around the outside of the Nickel (7/8" diameter loop).
Photo courtesy of Gaylen Gerrish. |